|
Paper Plate Education
"Serving the Universe on a Paper
Plate"
Activity: All-Sky Projectors for
Portable Planetariums
Starlab® operators can use clear
plastic drinking cups as miniature clear cylinders. Images drawn on the cups by students can then be projected
onto the dome as personal all-sky images and integrated into diverse lesson
plans.
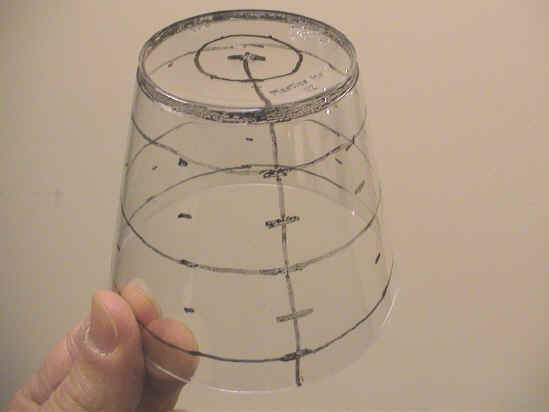
Projection Cylinders
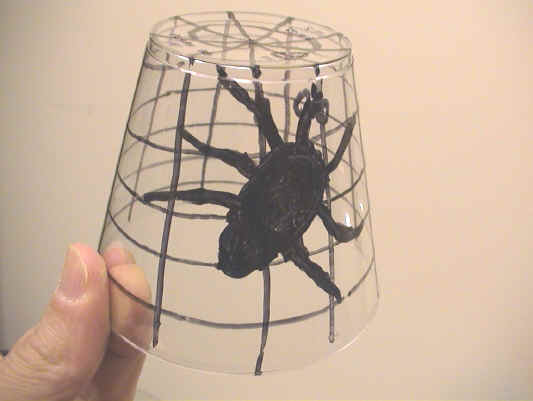
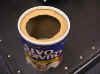
For good results use black markers on hard, clear, 9 oz.
tumblers such as Solo® cups. Though the harder cups tend to crack easily,
they are more desirable than the softer, more flexible tumblers, which project a
mottled background.
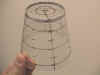
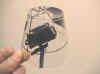
When drawing on the inverted cup, consider how the projected image will appear. With some practice you
can compensate for keystoning and other irregularities. Images tend to project larger than expected, too.
 To draw letters so they are
oriented properly, hold the cup upside down.
Looking through the closer side of the cup, write on the inside surface
that is away from you. If the image
contains something in motion, such as a fish, draw it so that it moves to the
right (consider the Starlab® diurnal motion). To draw letters so they are
oriented properly, hold the cup upside down.
Looking through the closer side of the cup, write on the inside surface
that is away from you. If the image
contains something in motion, such as a fish, draw it so that it moves to the
right (consider the Starlab® diurnal motion).
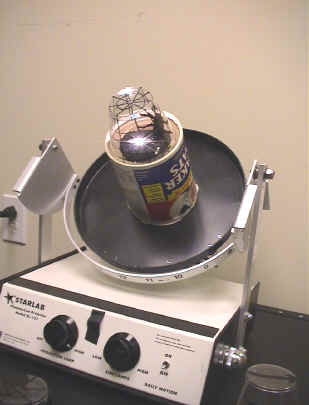
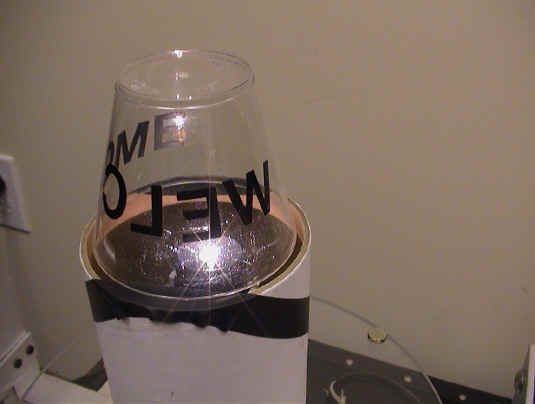
Economy Projector
The upside down cup has to be
positioned so that the cup's rim is nearly level with the projector’s light source.
The easiest method is to use the cylindrical lamp protector that is
shipped with
the Starlab®. It looks like a
mailing tube a few inches in diameter and about five inches long.
 Stick a few pieces of electrical
tape tautly across the edges of an end of the tube so that a cup can rest on the
non-sticky side of tape without falling into the tube itself. The
tape must not span the center of the tube or it will obstruct the light and will
itself be projected onto the dome. Stick a few pieces of electrical
tape tautly across the edges of an end of the tube so that a cup can rest on the
non-sticky side of tape without falling into the tube itself. The
tape must not span the center of the tube or it will obstruct the light and will
itself be projected onto the dome.
 Position
the tube around the lamp holder as it would be while in storage. By the
way, this ledge of tape can remain permanently affixed to the tube, for it does
not interfere with the tube's protective feature during shipping and
storage. Position
the tube around the lamp holder as it would be while in storage. By the
way, this ledge of tape can remain permanently affixed to the tube, for it does
not interfere with the tube's protective feature during shipping and
storage.
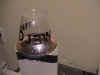 Finally, place the
personalized all-sky cup on the tape so it is centered over the lamp.
Though applying this device is very quick and very easy, you are limited to
level all-sky projections that won't be bumped. Finally, place the
personalized all-sky cup on the tape so it is centered over the lamp.
Though applying this device is very quick and very easy, you are limited to
level all-sky projections that won't be bumped.
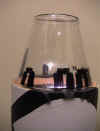
Advanced Projector
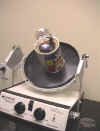 A second cheap method for
holding plastic cups requires much less care in balancing the cup and allows the
Starlab® operator to switch cups rapidly. It
also permits you to incline the cup (akin to tilting the cylinder to a
non-equatorial latitude). A second cheap method for
holding plastic cups requires much less care in balancing the cup and allows the
Starlab® operator to switch cups rapidly. It
also permits you to incline the cup (akin to tilting the cylinder to a
non-equatorial latitude).
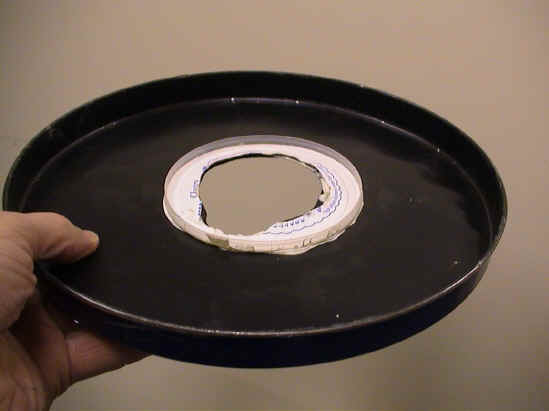
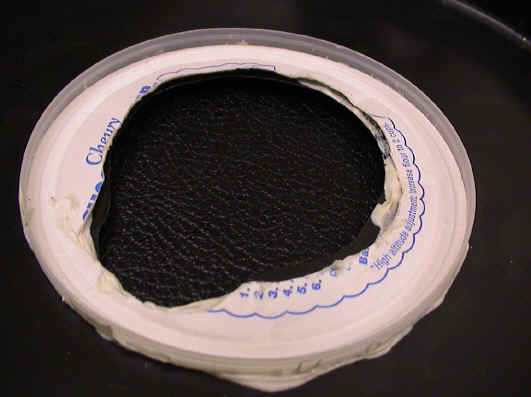
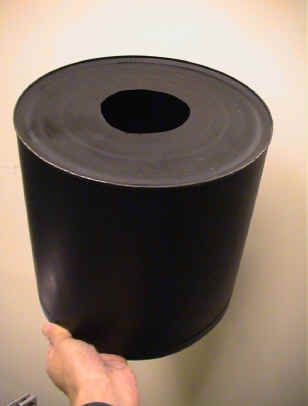
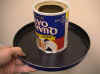
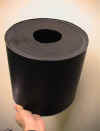
 Conveniently, some metal cans
such as those for gourmet popcorn are nearly identical in size to a Starlab®
cylinder. Cut a circle out of the
can’s lid so it will fit over the Starlab® projector’s central stalk and over
the aligning device for cylinders. Later
the upside down lid will lock securely on the magnets. Conveniently, some metal cans
such as those for gourmet popcorn are nearly identical in size to a Starlab®
cylinder. Cut a circle out of the
can’s lid so it will fit over the Starlab® projector’s central stalk and over
the aligning device for cylinders. Later
the upside down lid will lock securely on the magnets.
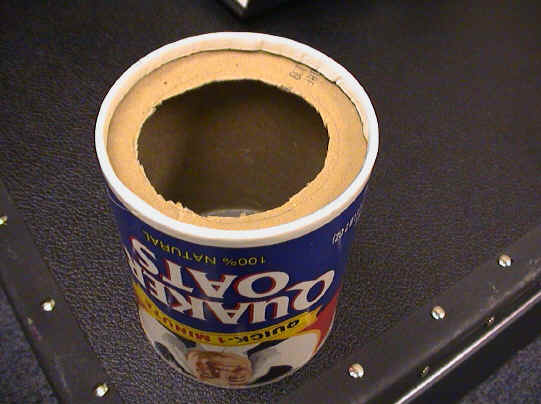
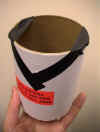
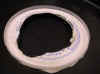
 Shorten to about five inches a
cylindrical Quaker Oats® oatmeal box. Peel the plastic rim off the top of
the cardboard cylinder and re-affix it to the shortened box top. Shorten to about five inches a
cylindrical Quaker Oats® oatmeal box. Peel the plastic rim off the top of
the cardboard cylinder and re-affix it to the shortened box top.
 On
the bottom of the oatmeal container, cut out a circle just smaller than the
diameter of the plastic cup, leaving a cardboard ledge on which a cup can be
placed. On
the bottom of the oatmeal container, cut out a circle just smaller than the
diameter of the plastic cup, leaving a cardboard ledge on which a cup can be
placed.
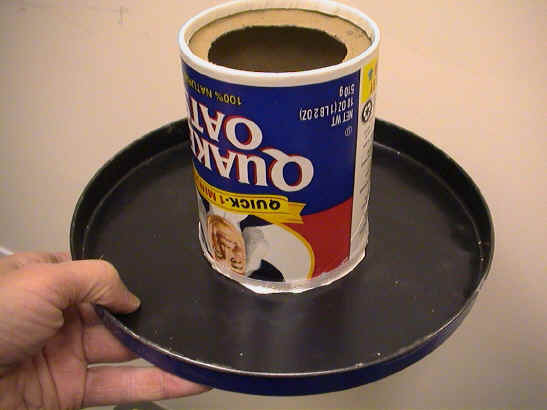
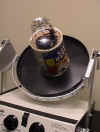
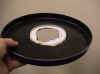
 Center the upside down
oatmeal container lid over the hole of the upside down popcorn can lid and cut
out a similar hole and notch, again to allow the Starlab® stalk to fit through
them both. Glue the lids together (I used some leftover bathtub caulk).
When in use, the oatmeal box will now remain locked over the center of
the platform, yet you can separate them when you want to transport or store
them. Center the upside down
oatmeal container lid over the hole of the upside down popcorn can lid and cut
out a similar hole and notch, again to allow the Starlab® stalk to fit through
them both. Glue the lids together (I used some leftover bathtub caulk).
When in use, the oatmeal box will now remain locked over the center of
the platform, yet you can separate them when you want to transport or store
them.
When the glue or caulk dries, paint the entire device flat black if you
wish to reduce the amount of reflected light.
 You are now ready to place the
cups with drawings onto the custom cup holder, thereby projecting personalized
all-sky images. You are now ready to place the
cups with drawings onto the custom cup holder, thereby projecting personalized
all-sky images.
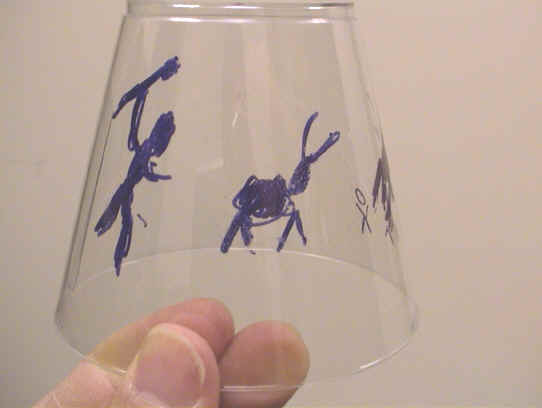
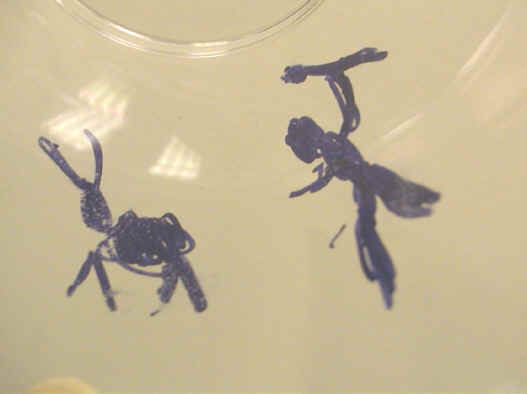
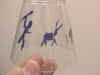
 Several cup designs were presented at the portable planetarium session of the 1997 GLPA
Conference.
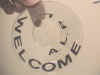
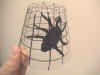
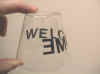
Among the all-sky scenes were the insides of an igloo and an observatory;
a sky full of bats; the horizon at Stonehenge; an underwater scene; a GLPA Conference welcome; and a spider
in its huge web.
Several cup designs were presented at the portable planetarium session of the 1997 GLPA
Conference.
Among the all-sky scenes were the insides of an igloo and an observatory;
a sky full of bats; the horizon at Stonehenge; an underwater scene; a GLPA Conference welcome; and a spider
in its huge web.
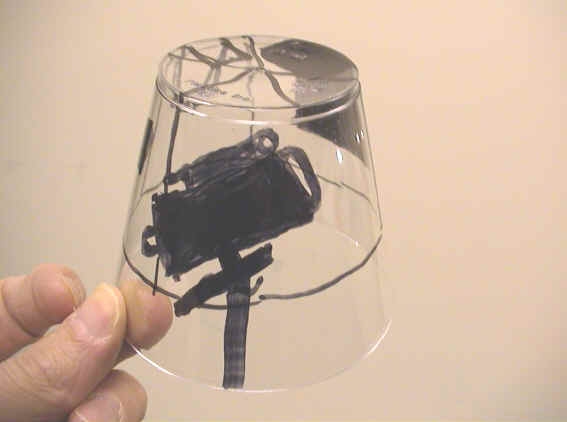
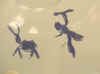 Another design mimics a
petroglyph of a hunter pursuing some prey.
Before entering the dome, young students can be prepared for an
expedition into a cave. With their
imaginary headlamps illuminating the way, they crawl into the Starlab® tunnel and
discover the cave art on the inside wall. Another design mimics a
petroglyph of a hunter pursuing some prey.
Before entering the dome, young students can be prepared for an
expedition into a cave. With their
imaginary headlamps illuminating the way, they crawl into the Starlab® tunnel and
discover the cave art on the inside wall.
There are unlimited scenes that
can be projected onto the inside of a dome to support a wide range of
disciplines and lesson plans. Student
drawings can dovetail with or diverge from the instructor's drawings on a Starlab® clear
cylinder.
  Keep
the metal popcorn can with a hold cut in its base for other uses. For
example, secure a piece of plexiglass over the top to make a circular overhead
projector in the Starlab®. Or come up with your own applications and
submit them to the Paper Plate Education collection. Keep
the metal popcorn can with a hold cut in its base for other uses. For
example, secure a piece of plexiglass over the top to make a circular overhead
projector in the Starlab®. Or come up with your own applications and
submit them to the Paper Plate Education collection.
See Constellation
Projector for related applications.
Contributed by Chuck Bueter.
GLPA Proceedings, 1997,
p. 147.
.
|