|
Paper Plate Education
"Serving the Universe on a Paper
Plate"
Activity: Planet Pointer II
|
This and several other activities from
the Paper Plate Astronomy videotape and DVD are now available
online as
free streaming video! |
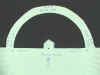
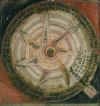 Volvelles such as this 15th
Century version were designed to aid in the calculation of the locations of
the planets throughout the year. The Paper Plate Planet Pointer performs a
similar function by indicating
the position of the planets in the sky for
any given time for mid-latitude observers.
Volvelles such as this 15th
Century version were designed to aid in the calculation of the locations of
the planets throughout the year. The Paper Plate Planet Pointer performs a
similar function by indicating
the position of the planets in the sky for
any given time for mid-latitude observers.
Image courtesy of Chetham's Library, U.K.; used
with permission.
The Paper Plate Planet Pointer consists of two plates--a planet
positions plate (which must be updated monthly) and a local horizon plate.
First, make a plate that indicates the direction of the planets relative to
earth, which is centered on the planet positions plate. This can be done
in several ways, two of which are illustrated below.
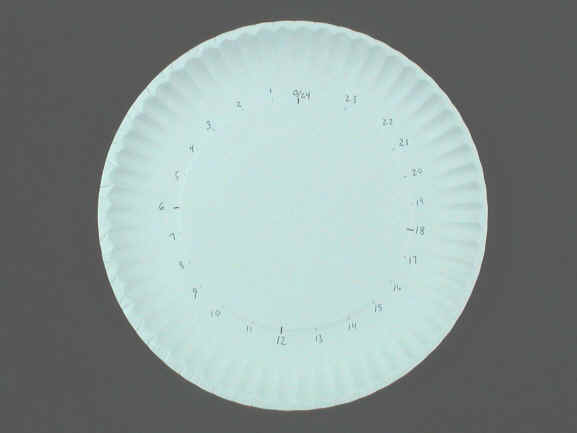
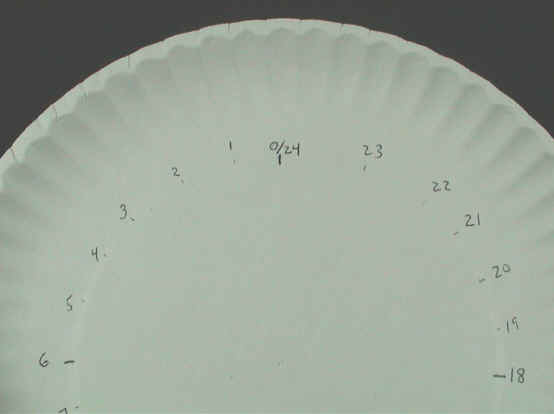
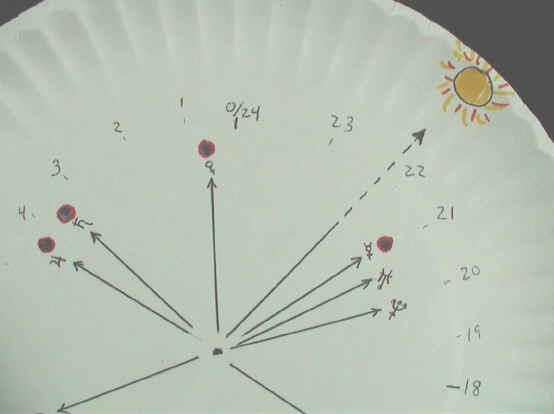
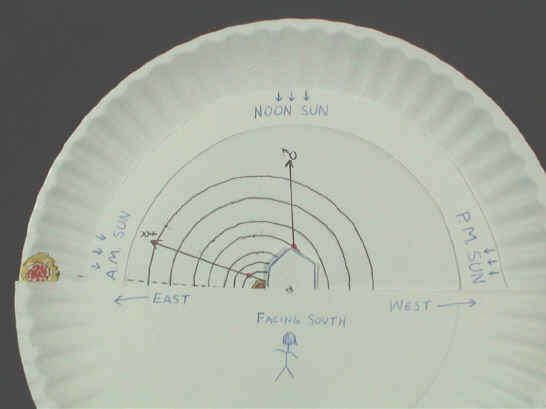
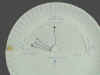
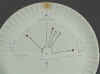
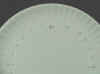 Around the perimeter of a plate, mark 24 hours of right ascension
counterclockwise. The center of the plate represents earth.
Around the perimeter of a plate, mark 24 hours of right ascension
counterclockwise. The center of the plate represents earth.

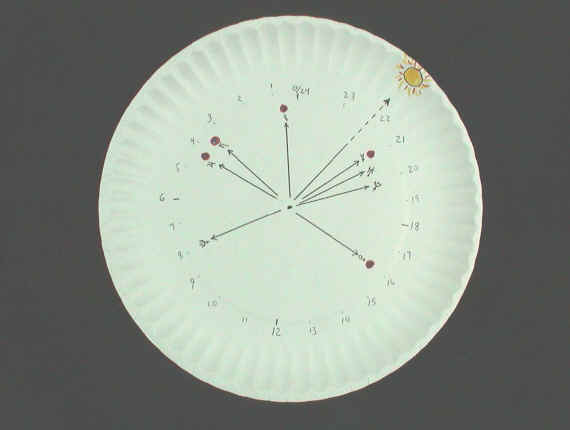
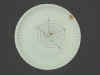
 Plot
the positions of the planets and the sun by extending lines outward from the
central earth to the right ascension value. The R.A. values can be found
under "Planet Summary Data" and at "Sun and Moon data for
today" at http://www.heavens-above.com.
In the sample images, the visible planets are highlighted with a red
circle. Label the lines with planet names or symbols. Extend the sun
line to the edge of the plate and draw a sun there. Plot
the positions of the planets and the sun by extending lines outward from the
central earth to the right ascension value. The R.A. values can be found
under "Planet Summary Data" and at "Sun and Moon data for
today" at http://www.heavens-above.com.
In the sample images, the visible planets are highlighted with a red
circle. Label the lines with planet names or symbols. Extend the sun
line to the edge of the plate and draw a sun there.
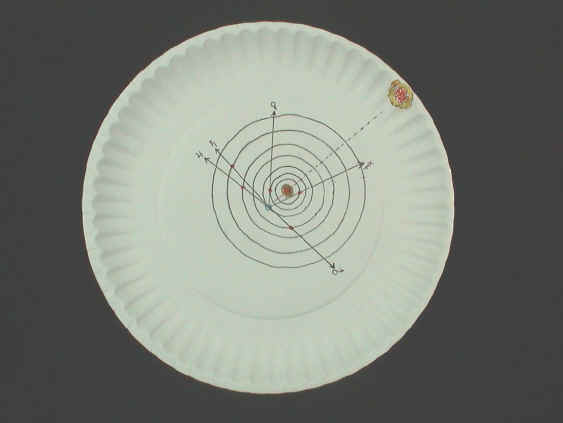
 An alternative method is to draw the earth at the center of the plate in orbit
around the sun. Be sure the earth is centered and the orbits go
around the sun, which is off-center. From the earth, extend lines outward
through the planets (in their current orbital positions) toward the perimeter of
the plate. Notice that the inferior planets can be in two different
positions in their orbit and still yield the same line of sight. Label the
lines with planet names or symbols. Again extend the sun line to the edge
of the plate and draw a sun there. The resulting lines should be identical
to the first method that uses right ascension.
An alternative method is to draw the earth at the center of the plate in orbit
around the sun. Be sure the earth is centered and the orbits go
around the sun, which is off-center. From the earth, extend lines outward
through the planets (in their current orbital positions) toward the perimeter of
the plate. Notice that the inferior planets can be in two different
positions in their orbit and still yield the same line of sight. Label the
lines with planet names or symbols. Again extend the sun line to the edge
of the plate and draw a sun there. The resulting lines should be identical
to the first method that uses right ascension.
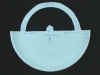
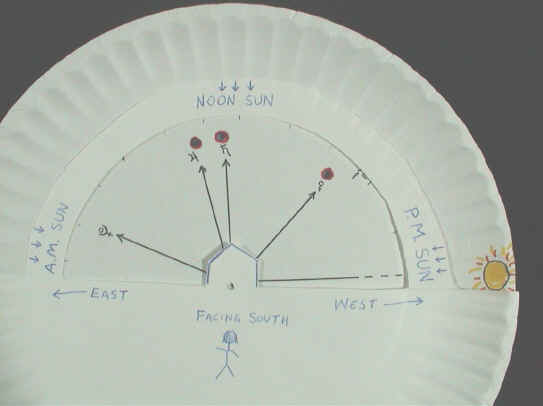
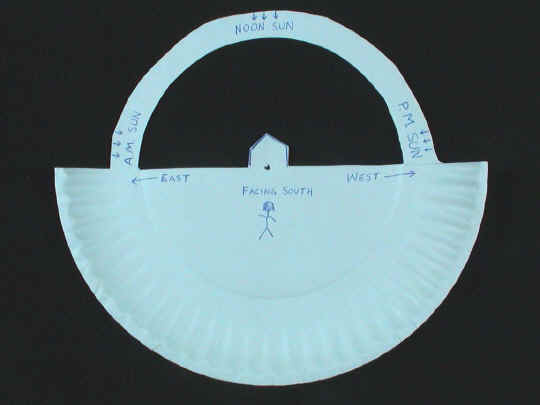
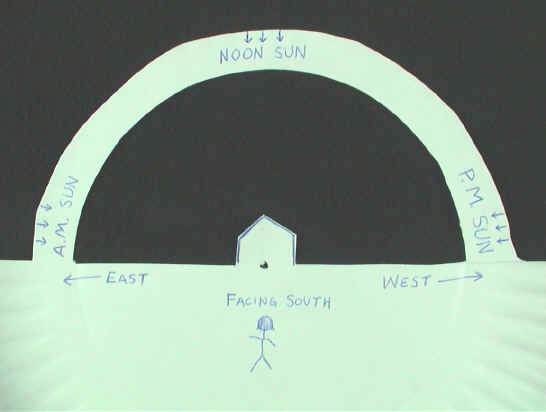
 Make a horizon plate as shown. The plate depicts an observer who is
facing south, with east being toward her left and west being toward her
right. The outer edge of the horizon plate is cut away to allow the sun to
be seen on the perimeter.
Make a horizon plate as shown. The plate depicts an observer who is
facing south, with east being toward her left and west being toward her
right. The outer edge of the horizon plate is cut away to allow the sun to
be seen on the perimeter.
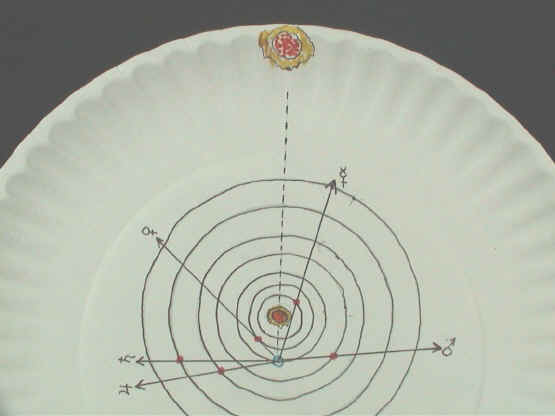
Place the horizon plate over the planets plate and secure them
with a paper fastener. The fastener goes through the center of the horizon
plate and through the earth on the planets plate. Your instrument is ready
for use.
 The
sun indicates the time, rotating clockwise once every 24 hours. When the
sun is low along the eastern horizon, the time is sunrise (or simply AM).
When the sun is high and due south, the time is noon. When the sun is low
along the western horizon, the time is sunset (or simply PM). When the sun
is opposite the noon position and below the horizon, the time is midnight.
When the sun is between those four positions, interpolate for time. This
will compensate for some inaccuracies that become amplified near the solstices.
The
sun indicates the time, rotating clockwise once every 24 hours. When the
sun is low along the eastern horizon, the time is sunrise (or simply AM).
When the sun is high and due south, the time is noon. When the sun is low
along the western horizon, the time is sunset (or simply PM). When the sun
is opposite the noon position and below the horizon, the time is midnight.
When the sun is between those four positions, interpolate for time. This
will compensate for some inaccuracies that become amplified near the solstices.
Using the sun as a time indicator, set the sky to an approximate
time. Though the sun indicates the time, refrain from referring to the sun
as a "clock." Users tend to envision a 12-hour clock face rather
than determining the time from the sun's position relative to the local
horizon.
Provided the sun is below the horizon, the planets that are
visible will be above the horizon in the general direction to which their
respective lines point. Note how Mercury is always rising or setting near
the sun. The Planet Pointer also indicates which planets are not visible
because they are in the daytime sky.

 There are limitations to the accuracy of this device, obviously, but the Paper
Plate Planet Pointer gives you a fairly good idea of when to look and in which
direction to see each of the planets. A similar device, the Moon
Finder allows you to use your local horizon plate and a moon phases plate to
determine when and in which direction to look for any given moon phase.
There are limitations to the accuracy of this device, obviously, but the Paper
Plate Planet Pointer gives you a fairly good idea of when to look and in which
direction to see each of the planets. A similar device, the Moon
Finder allows you to use your local horizon plate and a moon phases plate to
determine when and in which direction to look for any given moon phase.
Contributed by Chuck Bueter.
GLPA Proceedings, 1996, pp. 47-50.
[Note: This activity is included in the Paper
Plate Astronomy video/DVD/streaming video.]
|