![]()
![]()
![]()
![]()
![]()
![]()
|
|
|
Paper Plate Education Activity: Sunrise Sunset
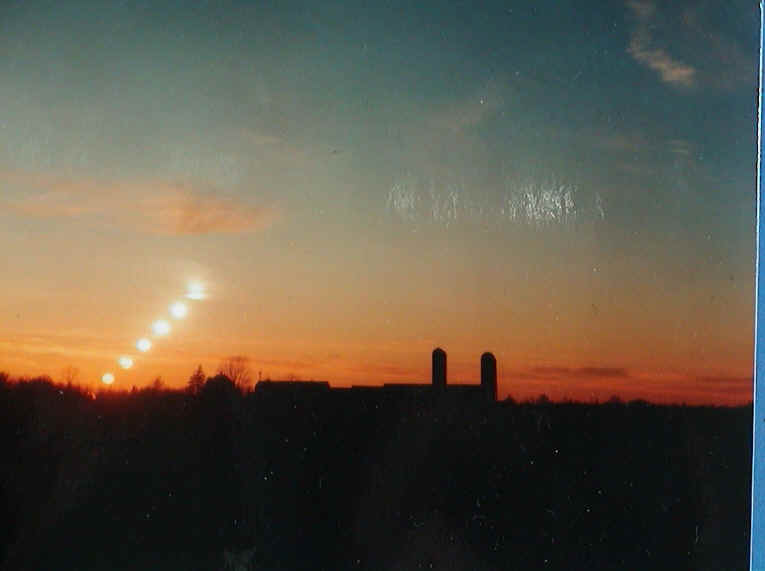
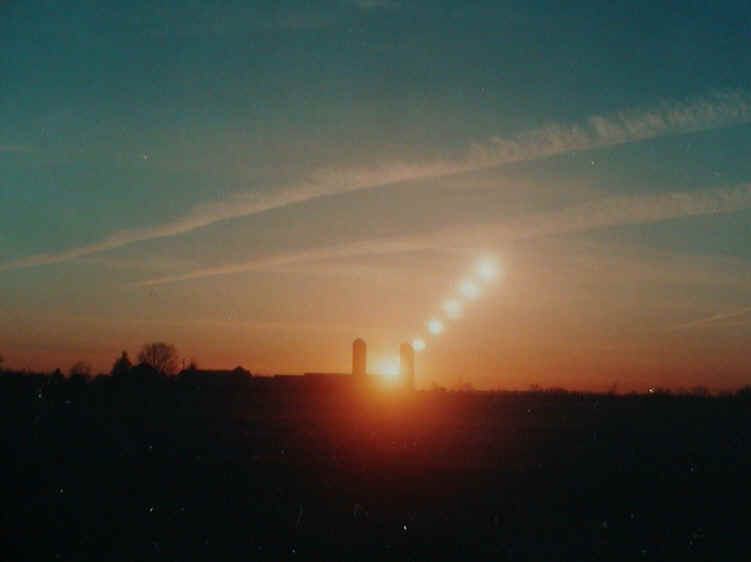
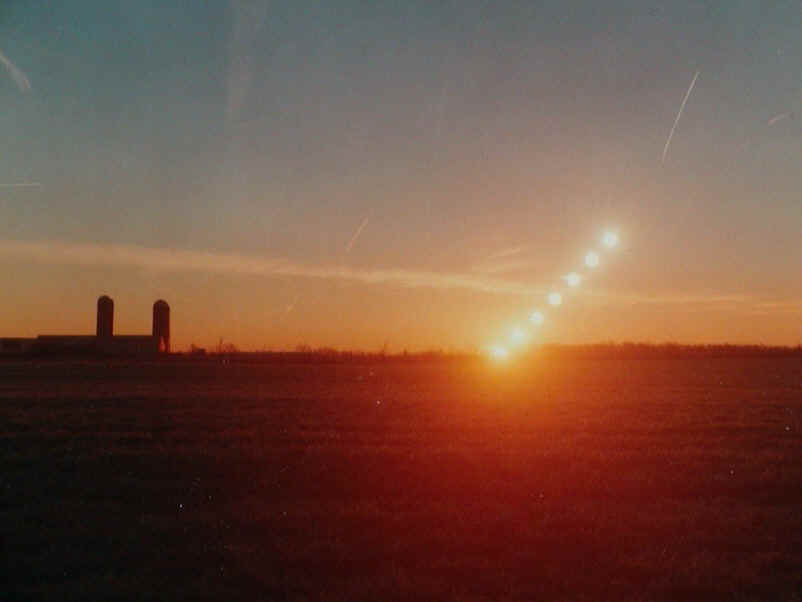
Sunrise pictures (summer solstice, equinox, winter solstice) courtesy of Rick Pirko.
Materials:
1 paper plate per student
pencils Object:
Awareness of the horizon making a circle around the observer.
Common labels of the circle for communication. 1.
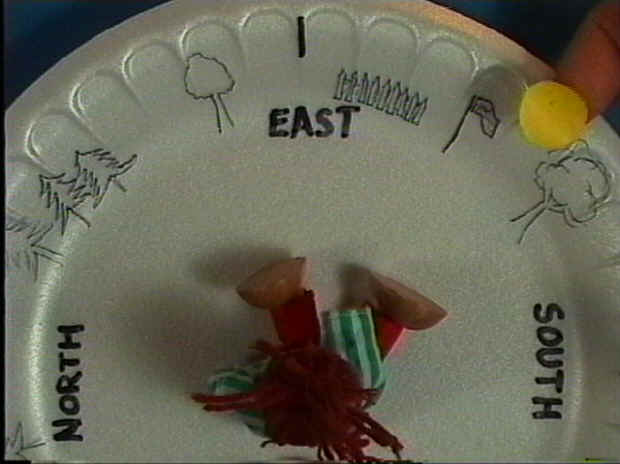
Smooth out most of the wrinkles. 2.
Pretend you are standing in the center of the plate. 3. Draw on the plate what you see on the earth.
Work your way from the center to the horizon.
Include just enough detail to be able to hold the plate the same way each
time you stand in the same spot. Complete
the plate by filling in the edge with what is on your horizon.
History: If we all stayed in the same town all our lives, we might talk about "yonder oak tree" and all would know which direction we meant. Even today if you ask directions, people will use objects they are familiar with...street names, buildings, grain elevators, "go down to the river and turn right", etc. We carry a map in our minds of our horizon. As people moved around, they wanted a map that would go with them. The most obvious was the Sun's pathway. You would describe a direction as being toward or away from the rising sun. But this is not very accurate as the sun doesn't rise on the same point on the horizon every day. Make a paper plate map for some point near your home or school where you
can return to the exact spot once a week when the sky is clear.
It might be 3 or 4 days or 2 weeks between sightings.
Draw enough detail to hold the plate the same way. Mark on the horizon where you see the sun rising or setting.
Put the time and date next to the mark.
See how long a period of time you can collect data.
Try doing the same thing
for the moon. You won't have to
collect data for as long before the cycle repeats itself...but it's a lot more
difficult to do because the moon changes much more faster both in location and
time. Try doing the same for
bright stars. Pick just a few...no
more than 5 of the brighter ones you see. This
will be easier than doing it for the moon.
You will discover the stars stay on a set pathway that's easier to locate
than both the moon and the sun. The
only problem is you have to work at night, and other lights get in the way as
well as clouds and weather...but that's part of the life of an astronomer! Contributed by Wayne James. Excerpted from GLPA Proceedings, 1992, p. 81. Used with permission.
A favorite tip of Paper Plate Education pertains to certain brands of foam plates. Some brands of foam plates, such as Hefty®, have decorative scallops or fluting around the perimeter. The edging is conveniently divided into 36 sections, so each scallop equals 10 degrees. If you use a foam plate for your Sunrise/Sunset local horizon, you can numerically quantify the position of the rising and setting bodies. Align the plate north and mark 360 degrees around the perimeter. Accurately mark where the horizon objects are relative to your fixed position. Simply interpolate between the ten degree increments. [Note: This activity is included in the Paper Plate Astronomy video/DVD/streaming video.] |
|
Copyright ©2012 Chuck Bueter. All rights reserved. |