|
Paper Plate Education
"Serving the Universe on a Paper
Plate"
Activity: The Platisphere

 |
This and several other activities from
the Paper Plate Astronomy videotape and DVD are now available
online as
free streaming video! |
 A
planisphere (pronounced "plane is feer") is a device that represents the sphere of stars on a plane surface.
In this activity we will make a Platisphere (pronounced
"plate is feer") , which depicts the
circumpolar stars on the surface of a paper plate. Variations
of the Platisphere include a tactile version, a children's
version, and a photographic version, plus
the Drinking Gourd activity and Gemini's
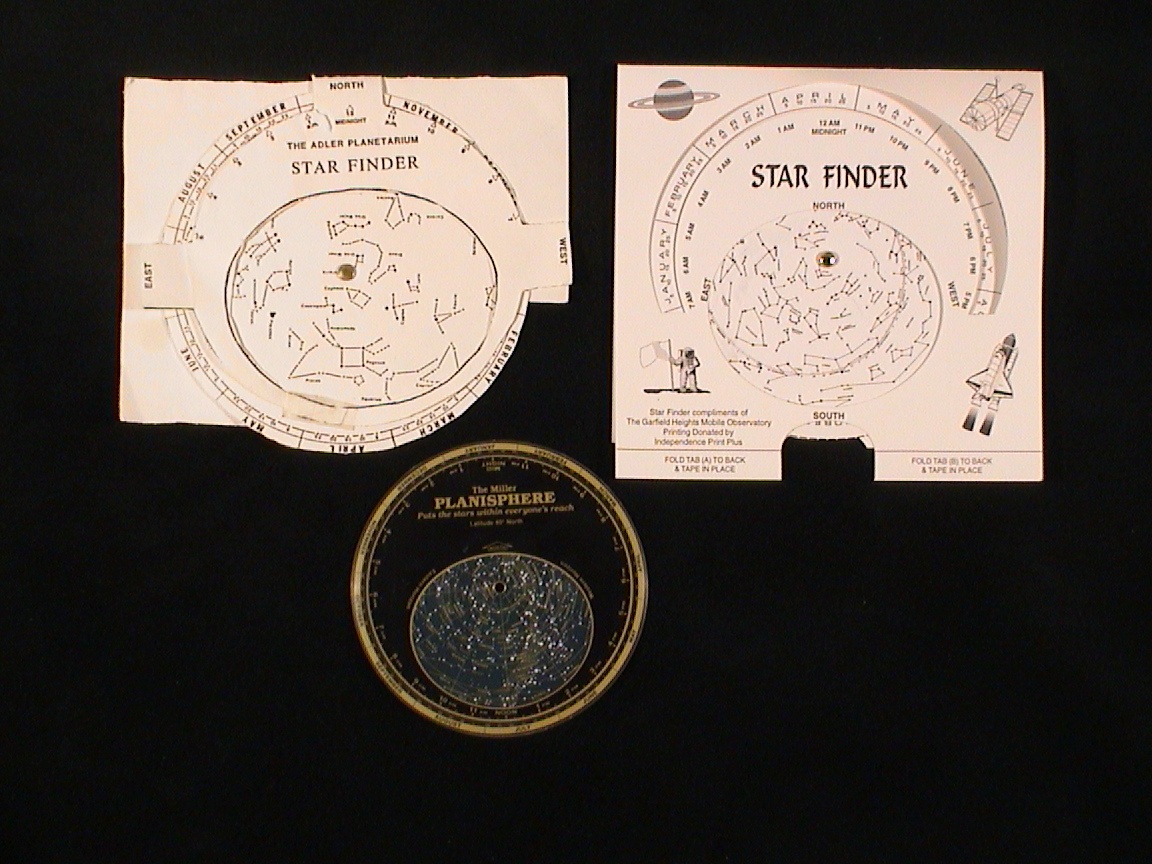
Signature activity. A planisphere that you may download and
print is available online. A
planisphere (pronounced "plane is feer") is a device that represents the sphere of stars on a plane surface.
In this activity we will make a Platisphere (pronounced
"plate is feer") , which depicts the
circumpolar stars on the surface of a paper plate. Variations
of the Platisphere include a tactile version, a children's
version, and a photographic version, plus
the Drinking Gourd activity and Gemini's
Signature activity. A planisphere that you may download and
print is available online.
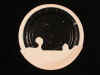
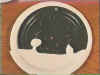
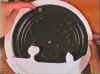
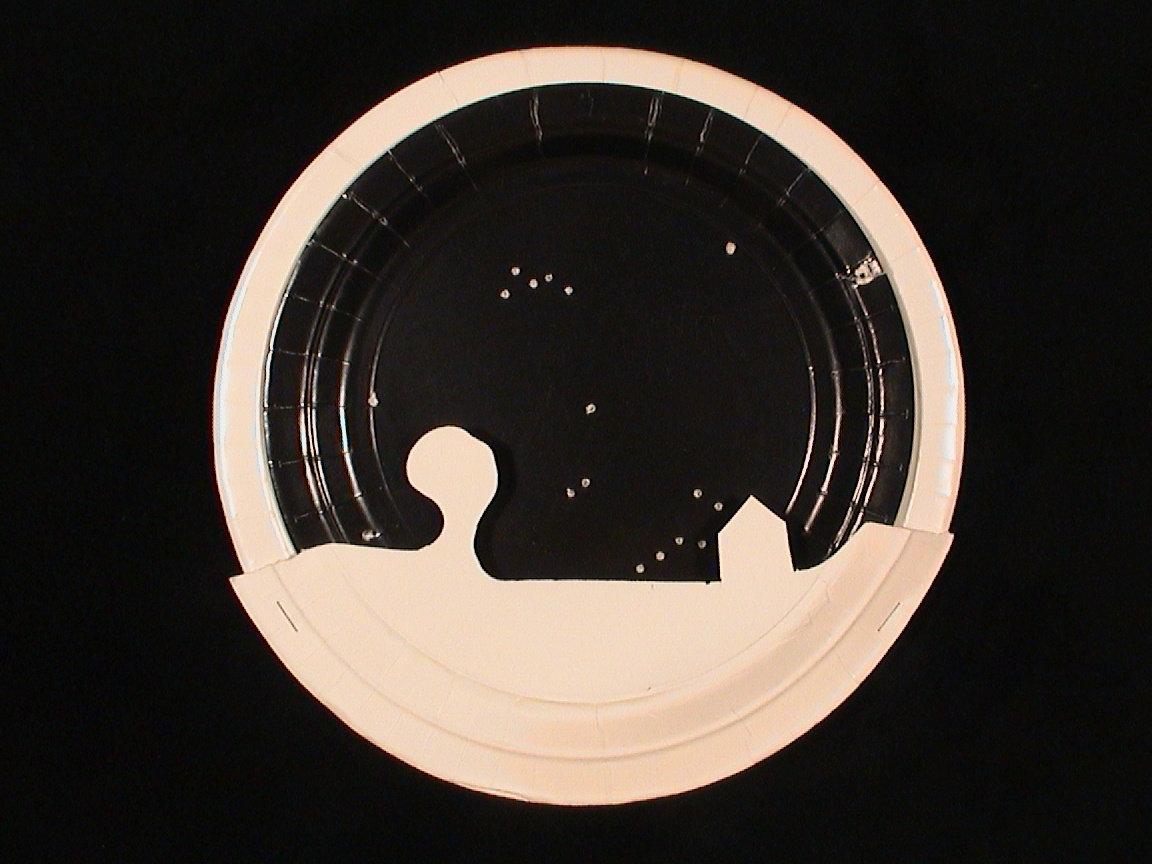
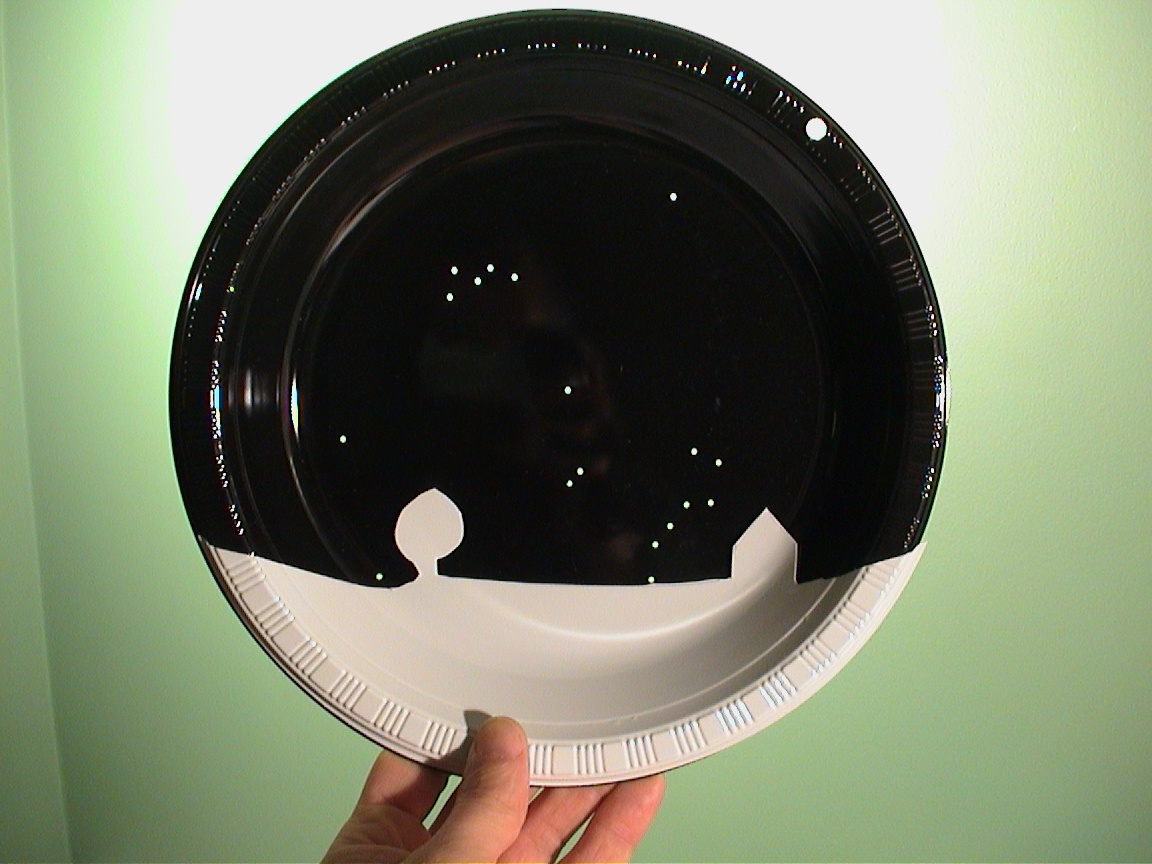
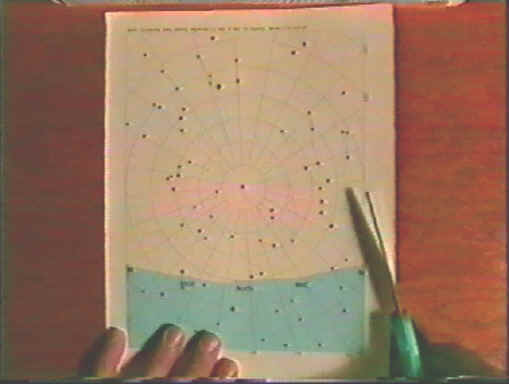
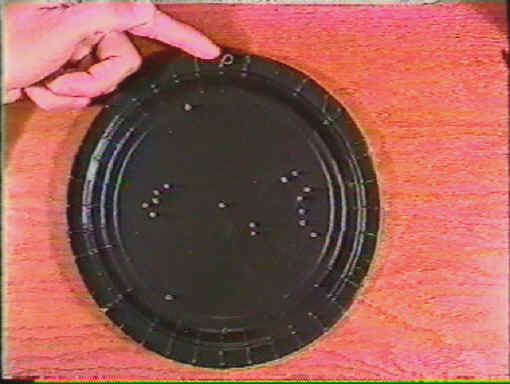
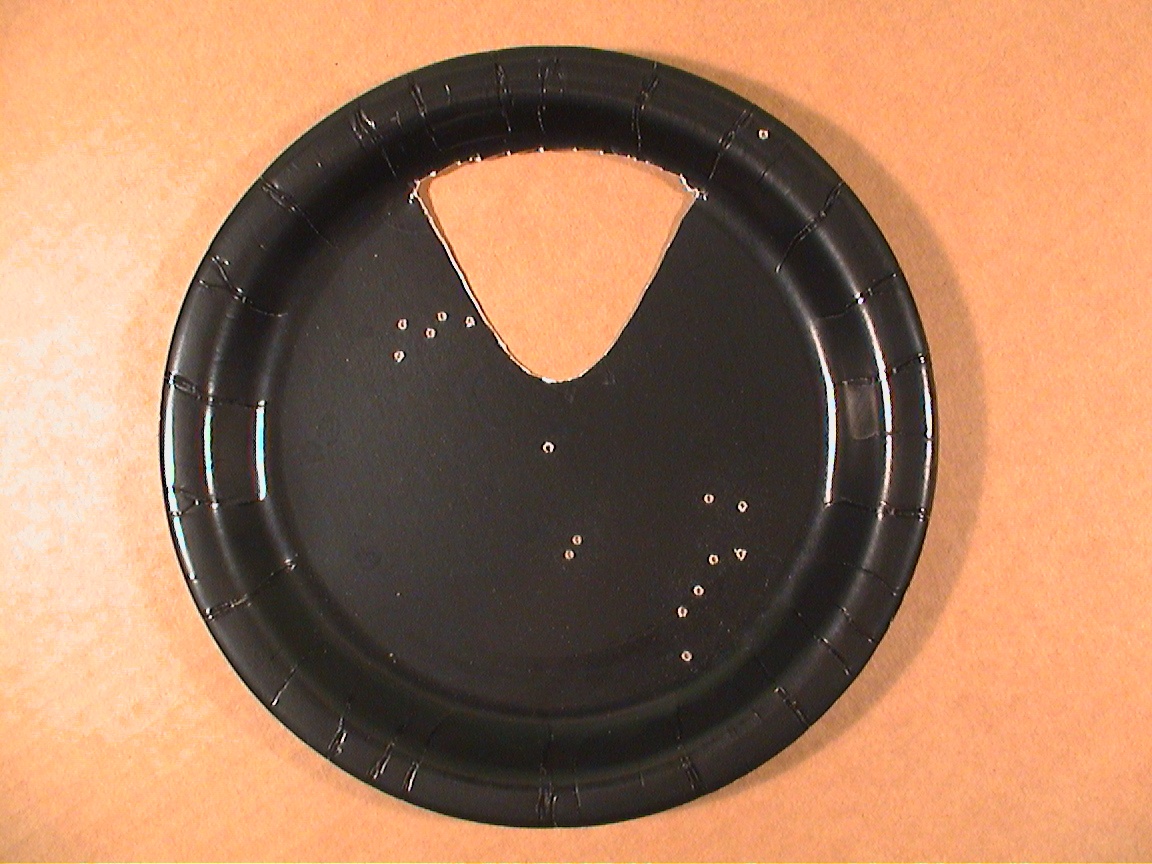
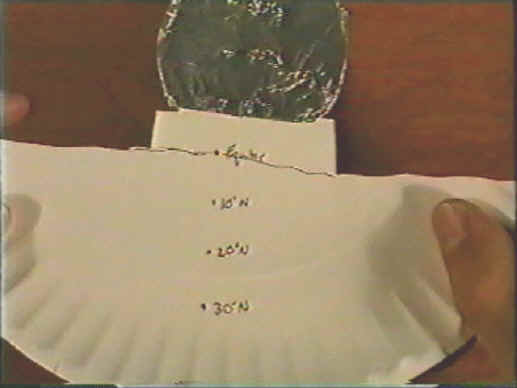
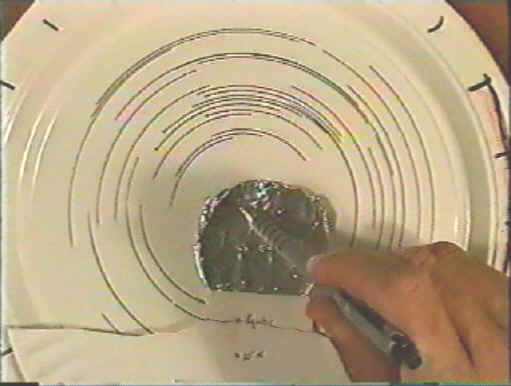
 To
make the Platisphere you first make the starfield plate. Using astronomy software, print out a star chart of the north circumpolar
stars centered on Polaris. Select a
limiting magnitude of 3.5; field of view equal to 100 degrees; horizon being
transparent; the meridian line indicated; and the starfield set for January 1 at
midnight. Cut off extra paper from
the star chart to include the circle of stars from Polaris down through 40
degrees of declination. To
make the Platisphere you first make the starfield plate. Using astronomy software, print out a star chart of the north circumpolar
stars centered on Polaris. Select a
limiting magnitude of 3.5; field of view equal to 100 degrees; horizon being
transparent; the meridian line indicated; and the starfield set for January 1 at
midnight. Cut off extra paper from
the star chart to include the circle of stars from Polaris down through 40
degrees of declination.
Click
the appropriate link to access a chart of the north circumpolar stars for the
desired latitude:
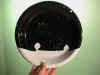
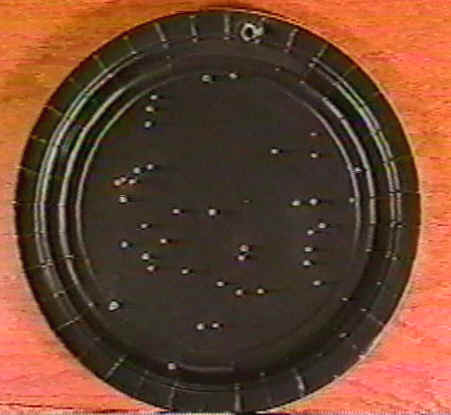
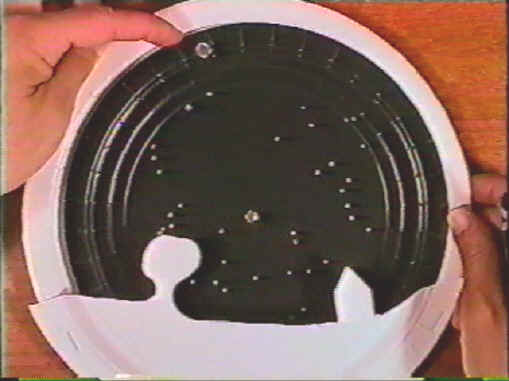
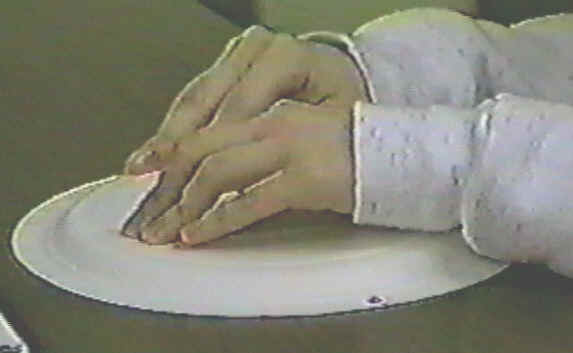
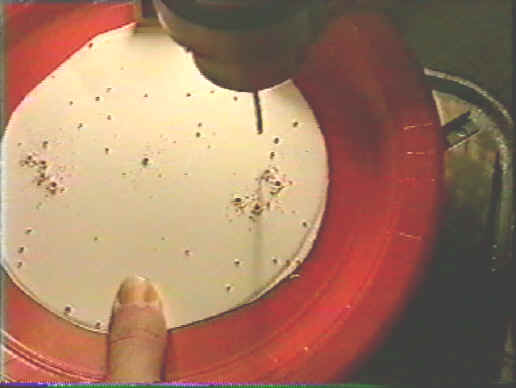
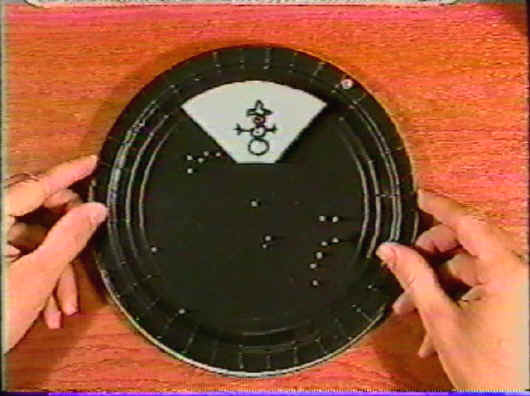
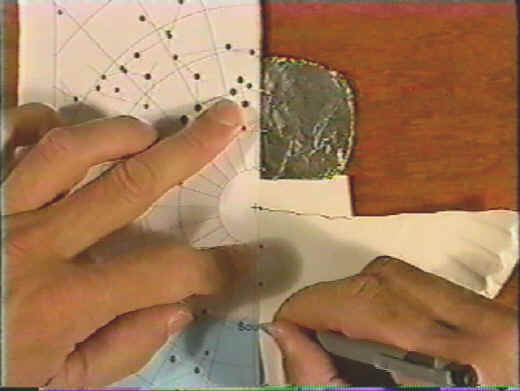
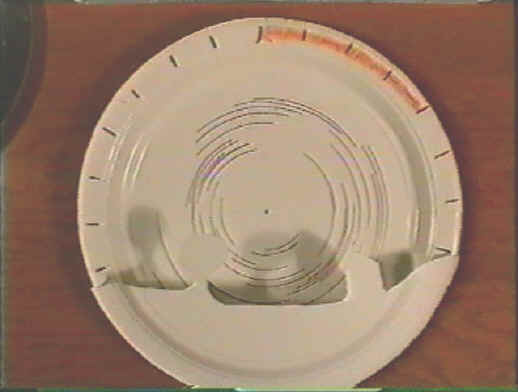
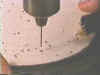 To
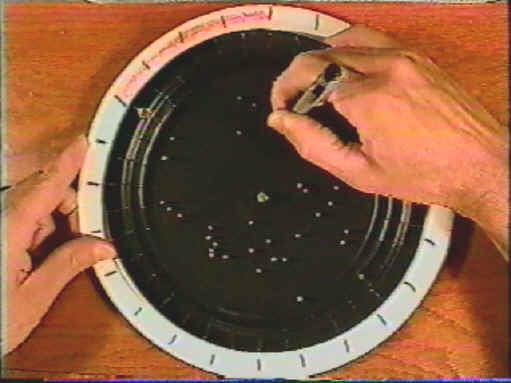
mass-produce enough Platispheres for an entire class, center and affix the chart
to the top of a stack of 9-inch black paper plates.
Clamp the stack so as not to cover any stars.
Using a drill or drill press, drill a hole through the stack of plates at
each of the stars shown on the top star chart. (As an alternative,
you can make one template plate, which students individually place over their
blank black plate. Students then mark the stars on their plate using the
holes of the template.) To
mass-produce enough Platispheres for an entire class, center and affix the chart
to the top of a stack of 9-inch black paper plates.
Clamp the stack so as not to cover any stars.
Using a drill or drill press, drill a hole through the stack of plates at
each of the stars shown on the top star chart. (As an alternative,
you can make one template plate, which students individually place over their
blank black plate. Students then mark the stars on their plate using the
holes of the template.)
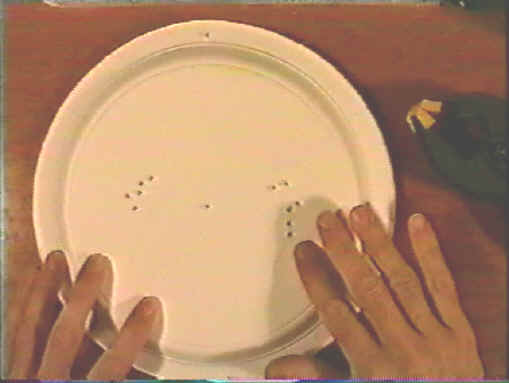
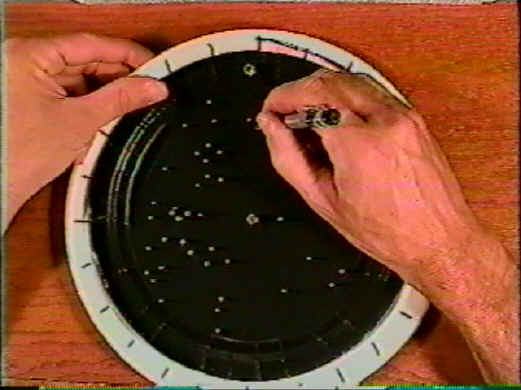
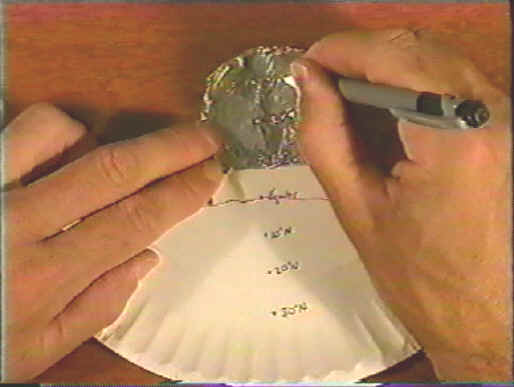
 Where the
meridian line extends to the perimeter of the paper plate, drill a large hole to
indicate the “Up” position for January 1 at midnight. Where the
meridian line extends to the perimeter of the paper plate, drill a large hole to
indicate the “Up” position for January 1 at midnight.
 When you hold the plate so the stars are shown with the hole
up, the starfield should coincide with the real sky view as the Third Millennium
begins. When you hold the plate so the stars are shown with the hole
up, the starfield should coincide with the real sky view as the Third Millennium
begins.
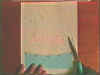
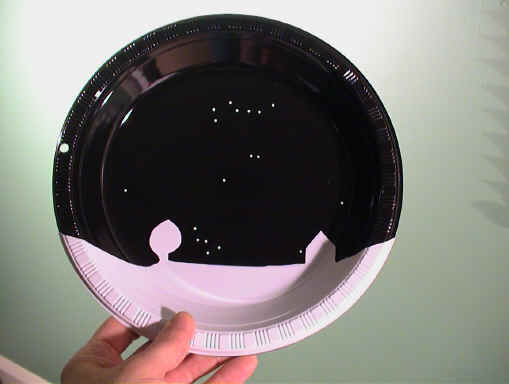
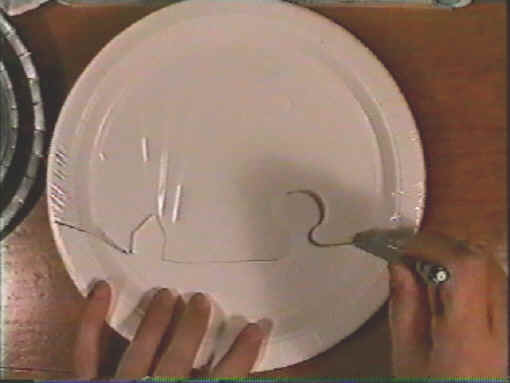
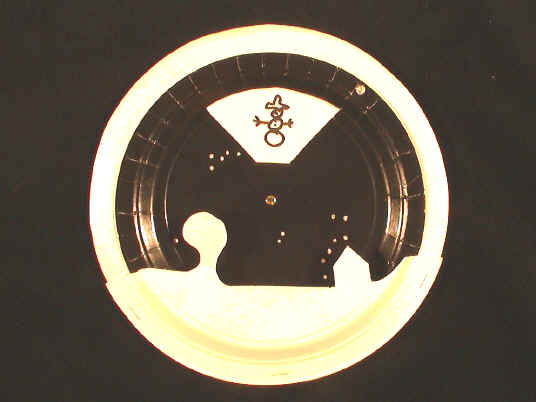
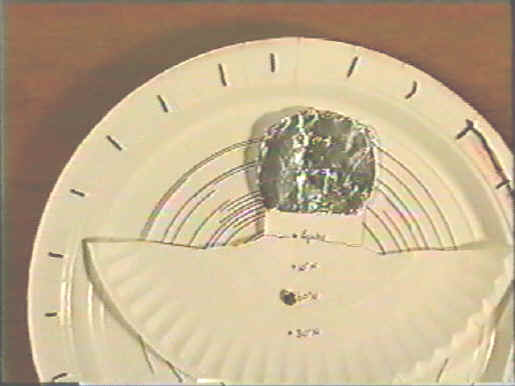
  Next make a
local horizon plate. On the center
of a larger (10-inches or more) white plate, punch a hole. As
an option, attach a small strip across the bottom of the plate and draw a scene
to the north, including trees or buildings as reference points.
To mass-produce local horizons, tape a horizon template onto a stack of
large white plates and cut local features out of the plates using a band saw or
scroll saw. Next make a
local horizon plate. On the center
of a larger (10-inches or more) white plate, punch a hole. As
an option, attach a small strip across the bottom of the plate and draw a scene
to the north, including trees or buildings as reference points.
To mass-produce local horizons, tape a horizon template onto a stack of
large white plates and cut local features out of the plates using a band saw or
scroll saw.
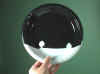
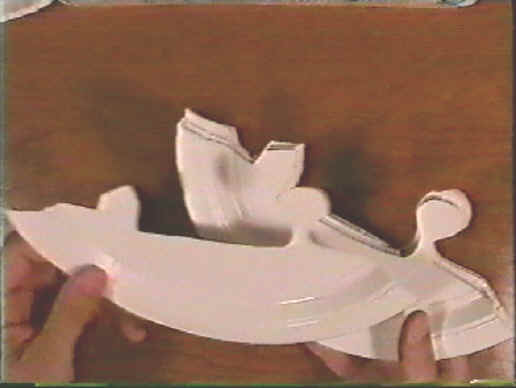
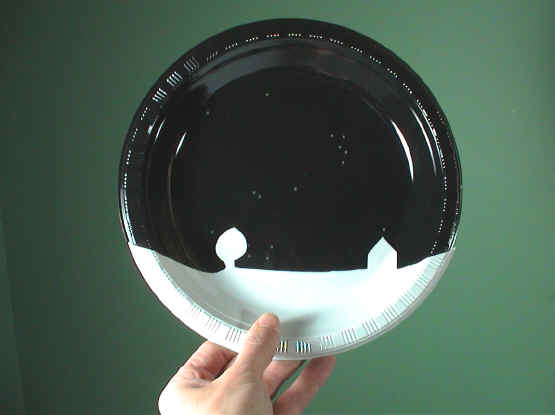
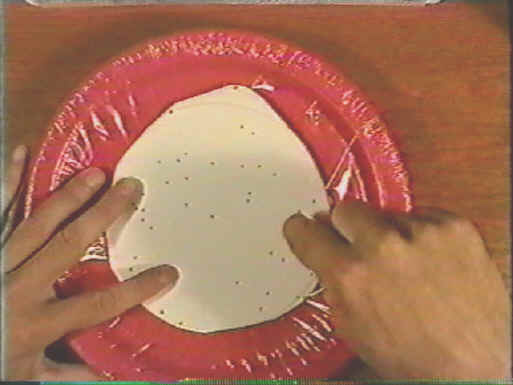
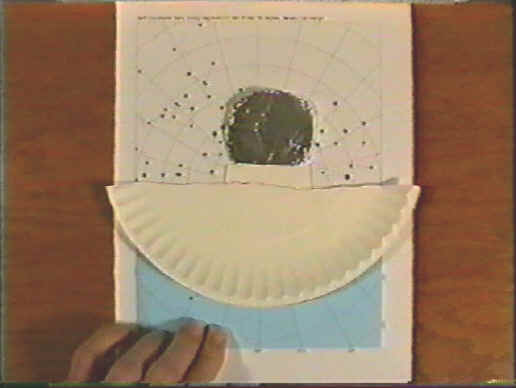
 Secure the
optional foreground horizon to the white background plate so as to have a
three-dimensional look. Slide the
black starfield plate between them and secure the black plate with a paper
fastener through Polaris and through the hole on the white plate.
Secure the
optional foreground horizon to the white background plate so as to have a
three-dimensional look. Slide the
black starfield plate between them and secure the black plate with a paper
fastener through Polaris and through the hole on the white plate.
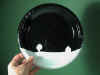 The foreground horizon should be low enough to cut off
the star Alkaid (at the end of the Dipper's handler) from view
as the black plate is rotated through 360 degrees.
As shown in this northern mid-latitude example, this suggests that Alkaid is technically not a circumpolar star from much
of the Great Lakes viewing area. Your
device is ready to use. The foreground horizon should be low enough to cut off
the star Alkaid (at the end of the Dipper's handler) from view
as the black plate is rotated through 360 degrees.
As shown in this northern mid-latitude example, this suggests that Alkaid is technically not a circumpolar star from much
of the Great Lakes viewing area. Your
device is ready to use.
Circumpolar
stars appear to rotate counterclockwise around the north pole, which is
conveniently marked in the sky by Polaris, the North Star.
Unlike the seasonal stars seen toward the south, circumpolar stars and
their respective constellations are visible throughout the year.
From the northern mid-latitudes region, the major circumpolar constellations are
Ursa Minor (The Little Bear), Ursa Major (The Great Bear), Cepheus (The King),
Cassiopeia (The Queen), and Draco (The Dragon).
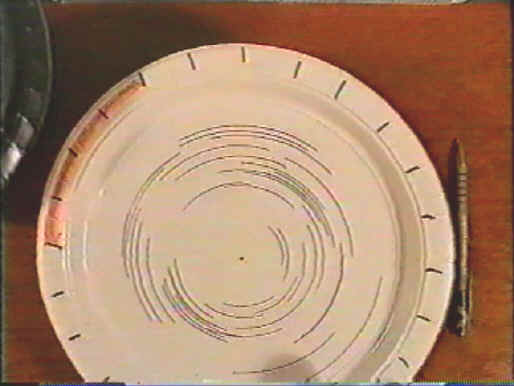
Because the
earth rotates once per day, the circumpolar stars appear essentially to travel
around Polaris every 24 hours. Each hour the stars sweep through 15 degrees of
sky. Therefore if you were to note
the position of a circumpolar constellation at, say, 9:00 PM, you would find
that six hours later at 3:00 AM the constellation would have rotated 90 degrees
around Polaris. A long-duration
photograph depicts this stellar motion as a smear of concentric arcs called star
trails.
 When the
indicator hole on the perimeter of the plate is centered
on top of the plate held vertical, the Platisphere sky is aligned for January
1 at Midnight. Relative to this
starting point, you will align your dial with the current sky by positioning the
indicator to the current date and time. When the
indicator hole on the perimeter of the plate is centered
on top of the plate held vertical, the Platisphere sky is aligned for January
1 at Midnight. Relative to this
starting point, you will align your dial with the current sky by positioning the
indicator to the current date and time.
 The white background plate and
foreground horizon will remain stationary and upright as you rotate the black
starfield plate through the hours and months. The white background plate and
foreground horizon will remain stationary and upright as you rotate the black
starfield plate through the hours and months.
 Commercial
planispheres are often crowded with many stars and look intimidating with
months, days, and hours around the perimeter. With the paper Platisphere
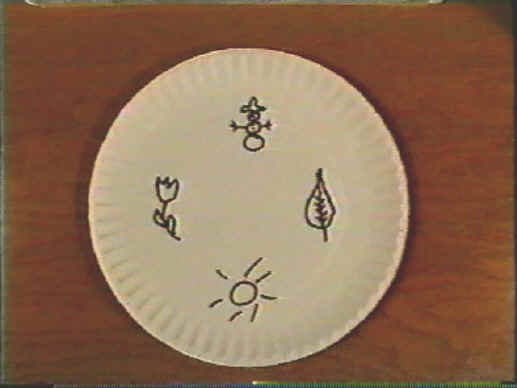
you can opt to eliminate the superfluous stars and text. The
children's version of the Platisphere allows you to set the starfield with the
aid of a seasonal picture for a clue. Commercial
planispheres are often crowded with many stars and look intimidating with
months, days, and hours around the perimeter. With the paper Platisphere
you can opt to eliminate the superfluous stars and text. The
children's version of the Platisphere allows you to set the starfield with the
aid of a seasonal picture for a clue.
To use the
Platisphere, first set the dial to the current date. Because the earth revolves 360 degrees around the sun in 365
days, the sky seems to shift about 1 degree per day. Mentally subdivide the
plate into 12 pieces of a pie to mark the 12 months of the year.
Rotate the indicator counterclockwise, or “starwise,”
the appropriate amount from January 1.
For
example, if your current date is September 1, spin the indicator through ¾ of a
year, or 9/12 of a plate, or 270 degrees.
The dial now
depicts the sky as it appears on September 1, but at midnight.
Next you must set the time relative to midnight.
Again, the stars appear to rotate counterclockwise,
or “starwise,” 15 degrees every hour.
If the current time is before midnight, spin the dial the appropriate
amount clockwise to “reverse” time. If
the current time is after midnight, spin the dial forward in time to “catch
up” to actual time.
 For example,
if the time to which you want to set the dial is 9:00 p.m., spin the indicator
hole clockwise (back in time) through 3/24ths of a day, or 1/8th
of a plate, or 45 degrees. Your
Platisphere would then show the stars aligned to the real sky for September 1 at
9:00 p.m. For example,
if the time to which you want to set the dial is 9:00 p.m., spin the indicator
hole clockwise (back in time) through 3/24ths of a day, or 1/8th
of a plate, or 45 degrees. Your
Platisphere would then show the stars aligned to the real sky for September 1 at
9:00 p.m.
VARIATIONS:
Three
variations of the Platisphere were displayed at the 2000 GLPA Annual Conference—a tactile version,
a
children’s version, and a photographic version.
Contributed by Chuck Bueter.
GLPA Proceedings, 2000,
pp. 67-68, with excerpts from demo Paper Plate Astronomy videotape.
[Note: This activity is included in the Paper
Plate Astronomy video/DVD/streaming video.]
| 


